
Molarity Dilution Calculator — Complete Guide & Formula
📋 Table of Contents
▼- Why Molarity Dilutions Form the Backbone of Laboratory Work
- Molarity Dilution Calculator — Five Essential Modes
- Understanding the M₁V₁ = M₂V₂ Equation
- Real Lab Scenarios Where Precision Dilution Matters
- Common Dilution Mistakes and the Chemistry Behind Them
- Expert Perspectives from Analytical Chemists
- Which Calculation Method Fits Your Chemistry Situation
- Advanced Applications Across Chemistry Disciplines
- Explore More Dilution Calculators & Guides
- Frequently Asked Questions
- Molarity Dilution Best Practices Checklist
- Trusted Reference Resources
- User Reviews & Ratings
- Final Thoughts on Mastering Solution Dilution
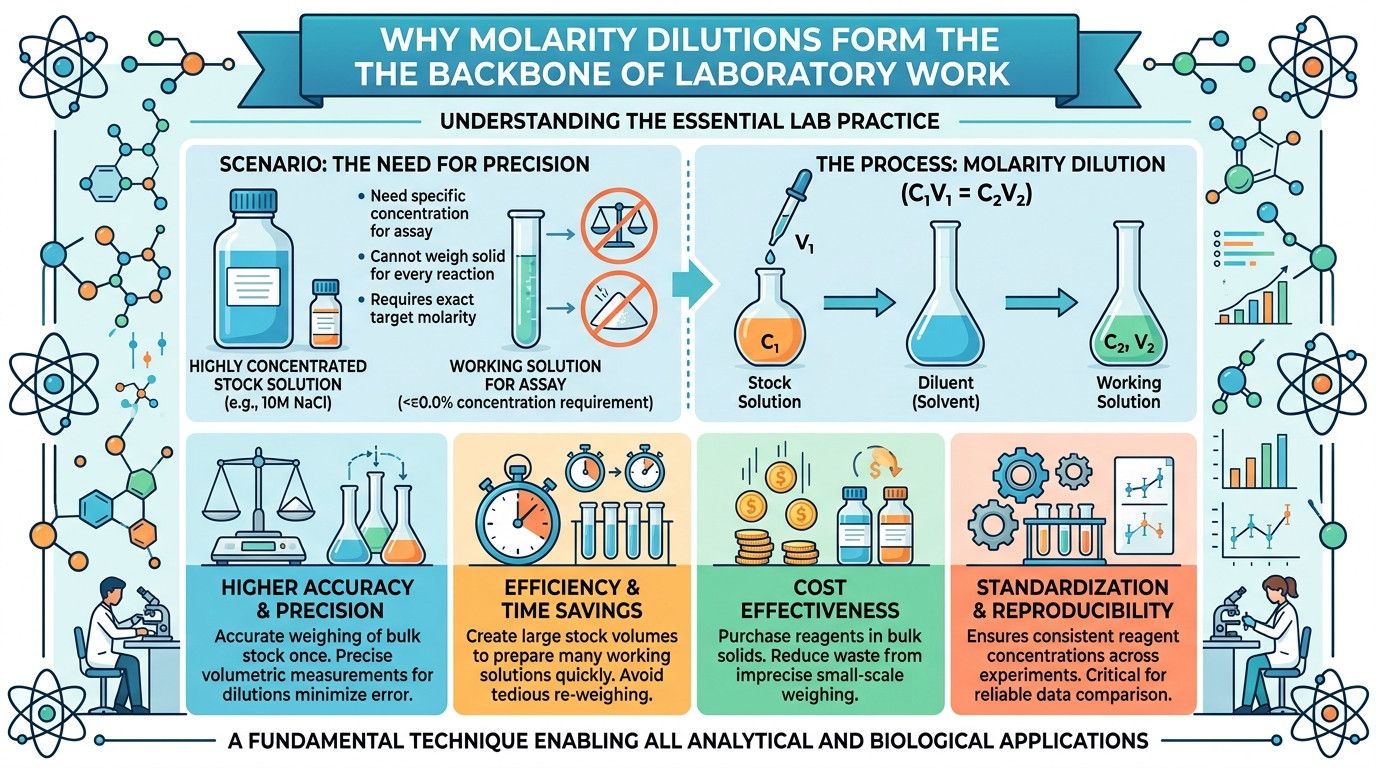
Why Molarity Dilutions Form the Backbone of Laboratory Work
Here’s a familiar scenario in every analytical or biological lab: you need a specific working concentration of a reagent to conduct an assay, but your chemical supply only contains highly concentrated stock solutions. You cannot afford to weigh solid powders for every single reaction. The solution? Dilution. Specifically, calculating exactly how much stock solution and how much diluent you need to reach your precise target molarity. If you want to read more about general lab practices, check our complete blogs section or read how to do dilutions in the lab.
A dilution is the process of decreasing the concentration of a solute in a solution, usually simply by mixing with more solvent like adding more water to a solution. To calculate the relationship between the initial and final molarities and volumes, chemists rely on the universal equation: M₁V₁ = M₂V₂. While the math seems straightforward, errors in these calculations account for a massive percentage of failed experiments, wasted reagents, and irreproducible assay results.
I’ve managed analytical labs for years, and the confusion rarely comes from the algebra itself. It usually stems from confusing target volume with diluent volume, mixing up molar and mass-based stock solutions, or attempting serial dilutions without a clear systematic approach. When an assay calls for a 50 mM working buffer from a 1 M stock, a small decimal error can mean your enzymes denature instantly. If you need a comprehensive overview of how to do a dilution calculation, this guide covers everything.
This Molarity Dilution Calculator addresses this daily laboratory necessity directly. The five calculation modes cover the entire spectrum of molarity preparation: the classic M₁V₁ = M₂V₂ dilution, calculating from solid mass, calculating from dense liquid stocks (like concentrated acids), managing complex serial dilutions, and even predicting the final molarity when mixing two different solutions. Whether you’re an undergraduate prepping your first standard curve, an environmental analyst adjusting pH buffers, or a biochemist making stock solutions — this tool handles the heavy lifting.
Molarity Dilution Calculator
Five modes — Basic Dilution, Solid Prep, Liquid Stock, Serial & Solution Mixing
Calculation Result
Understanding the M₁V₁ = M₂V₂ Equation
Dilution is the mechanism of reducing the concentration of a solute in a liquid. The principle rests on a simple law of conservation: when you add solvent (usually water) to a specific volume of solution, the number of moles of solute remains exactly the same. Only the total volume changes, which means the concentration (moles per unit volume) decreases. This is the foundational equation of all dilution calculations.
The Golden Rule of Dilution
Because the number of moles remains constant before and after dilution, we can construct the foundational equation of solution preparation. Molarity (M) is defined as moles of solute divided by volume in liters (V). Therefore, Moles = M × V. To review the absolute basics, check our calculation of dilution guide.
Since Initial Moles = Final Moles, we get:
M₂ = Final Desired Concentration · V₂ = Final Total Volume
Volume of Diluent to add = V₂ − V₁
The Hidden Trap: Diluent Volume vs. Final Volume
The most frequent mistake in dilution calculations isn’t mathematical; it’s operational. The V₂ in the equation stands for the Final Total Volume, not the volume of water you add.
If you calculate that you need 10 mL of 5 M stock solution (V₁) to make a 0.5 M solution with a final volume of 100 mL (V₂), you do not mix 10 mL of stock with 100 mL of water. If you did, your final volume would be 110 mL, and your concentration would be wrong. Instead, you add 10 mL of the stock to a container, and then add enough water to bring the total volume up to exactly 100 mL (which requires exactly 90 mL of diluent).

Real Lab Scenarios Where Precision Dilution Matters
The theoretical concept of dilution becomes critical when you see it applied in high-stakes laboratory settings. Here are real scenarios illustrating where precise dilution calculations make or break an experiment.
Scenario 1: The Standard Curve Disaster
An analyst in a water quality lab was running a spectrophotometric assay to detect trace metals. They needed to create a standard curve with concentrations of 0.1 M, 0.05 M, 0.025 M, and 0.0125 M starting from a 1 M stock solution. Instead of carefully calculating the V₁ and V₂ for each step, they attempted to estimate the dilution factors visually using non-volumetric glassware.
Because their standard curve was flawed at the dilution stage, every single sample tested against that curve produced artificially inflated heavy metal readings. The error was traced back to a simple misunderstanding of progressive dilutions. This is why using a dedicated serial dilution calculator or a sample dilution calculator is critical for analytical accuracy.
Scenario 2: The Concentrated Acid Hazard
A lab technician needed to prepare 1 Liter of 1 M HCl from concentrated Hydrochloric Acid (which is typically ~37% w/w, or roughly 12 M). They correctly calculated using M₁V₁ = M₂V₂ that they needed 83.3 mL of concentrated acid.
However, instead of adding the acid to the water, they added 916.7 mL of water directly into the 83.3 mL of concentrated acid. The highly exothermic reaction caused the acid to immediately boil and spatter, creating a severe safety hazard. The golden rule of acid dilution: Always Add Acid to water (AAA). For detailed safety protocols, see how to dilute acid safely and use our specific acid dilution calculator to double-check amounts.

Common Dilution Mistakes and the Chemistry Behind Them
Mistake 1: Forgetting to Subtract V₁ from V₂
As mentioned, V₂ is the total final volume. The volume of diluent (usually water) you need to add is V₂ – V₁. Adding V₂ amount of water directly to V₁ volume of stock will always give you a concentration slightly weaker than you intended.
Mistake 2: Mixing Units
M₁V₁ = M₂V₂ works flawlessly regardless of what volume units you use, as long as they are identical on both sides of the equation. If V₁ is in microliters (µL), V₂ must also be in microliters (µL). If you plug in 50 µL for V₁ and 1 Liter for V₂, your calculation will be off by a factor of 1,000.
Mistake 3: Ignoring Density in Liquid Stocks
When preparing a stock solution from a concentrated liquid (like concentrated Sulfuric or Nitric acid), you cannot just rely on the percent weight (% w/w) and the molecular weight. Because liquids are measured in volumes, you absolutely must factor in the liquid’s density (Specific Gravity) to convert the mass percentage into a Molarity (moles/L) before you can use the M₁V₁ = M₂V₂ formula.
Expert Perspectives from Analytical Chemists
Dilution is a skill that crosses every boundary in science. Here’s what working professionals say about mastering it.
“The biggest hurdle I see with new researchers isn’t the algebra; it’s the intuition. They will calculate that they need 1500 mL of stock to make 100 mL of a diluted solution, write it down, and not realize that mathematically, it’s impossible. Always step back and ask: ‘Does this dilution factor make sense?'”
“When you are making buffer solutions by mixing two separate molar stocks—like monobasic and dibasic phosphate—you aren’t just diluting; you are blending. Using a mixing formula to track the final concentration of the total phosphate pool is critical for maintaining your buffer’s ionic strength.”
Advanced Applications Across Chemistry Disciplines
While the basic M₁V₁ = M₂V₂ equation is taught in high school chemistry, its real-world applications in professional laboratories often involve complex multi-step processes or blending scenarios. Here are four specialized areas where molarity dilution principles are absolutely critical.
1. Serial Dilutions in Microbiology & Pharmacology
When you need a microscopic concentration of a substance—say, 10 nanomolar (nM) from a 1 Molar (M) stock—you cannot just do it in one step. Diluting 1 mL of 1 M stock to 100,000 Liters is physically impossible in a standard lab. Instead, chemists use serial dilutions: a step-wise series of dilutions where the diluted material of the previous step is used to make the subsequent dilution.
A common approach is a 1:10 serial dilution. You take 1 mL of your 1 M stock and add it to 9 mL of diluent to make 10 mL of 0.1 M. You then take 1 mL of that 0.1 M solution and add it to another 9 mL of diluent to make 0.01 M, and so on. Our Serial Dilution mode handles this math automatically, but you can also use our specialized 2-fold dilution calculator or 1:10 dilution calculator depending on your steps. For visual learners, review this microbiology serial dilution example.
2. Preparing Buffers by Blending Stock Solutions
In molecular biology, researchers frequently prepare buffers (like phosphate buffers) not by weighing solids and adjusting pH with strong acids or bases, but by mixing two stock solutions of different molarities or protonation states.
When mixing two solutions containing the same solute but at different molarities, the final molarity is the sum of the moles from both solutions divided by the total final volume: M_final = (M₁V₁ + M₂V₂) / (V₁ + V₂). This blends into the core principles of concentrations and dilutions, which you can quickly verify using our mixing panel above.
3. Trace Metal Analysis and High-Factor Dilutions
Analytical chemists running Inductively Coupled Plasma Mass Spectrometry (ICP-MS) or Atomic Absorption Spectroscopy (AAS) work in parts-per-million (ppm) or parts-per-billion (ppb). Often working in these units requires a ppm calculator or dedicated ppm dilution calculator to handle the math smoothly.
To create a calibration curve in the ppb range, analysts must perform highly precise serial dilutions. Any error at the stock dilution phase is magnified exponentially as the concentration drops. Using Class A volumetric flasks and highly calibrated micropipettes is mandatory, as is strictly following the M₁V₁ = M₂V₂ calculations.
4. Industrial Scale-Up and Liquid Stocks
In industrial chemistry and chemical engineering, preparing large batches of working solutions often starts with massive drums of concentrated liquid acids or bases. You cannot weigh these liquids easily, and their molarity isn’t printed on the label—only their density and mass percentage are.
Before any dilution can occur, you must convert these parameters into a working Molarity. The formula is Molarity = (% concentration × Density in g/mL × 10) / Molecular Weight. Once you calculate this initial molarity (M₁), you can plug it directly into the standard dilution equation to find out how many liters of concentrated stock are needed for a 10,000-liter reactor.
Explore More Dilution Calculators & Guides
Whether you’re working in a chemistry lab, a clinical setting, or doing household preparations, we have specialized tools and tutorials for every scenario to guarantee accuracy:
🧪 Laboratory & Chemistry
⚕️ Medical & Biological
🏠 Industrial & Household
Frequently Asked Questions About Molarity Dilutions
These are the most common points of confusion encountered by students, lab technicians, and researchers when calculating and performing solution dilutions.
The formula is a mathematical statement that the amount of solute (the chemical dissolved in the liquid) doesn’t change when you add more solvent (like water).
Molarity (M) is moles divided by volume (V). Therefore, M × V equals the number of moles. Because you are only adding water during a dilution, the initial moles (M₁ × V₁) must perfectly equal the final moles (M₂ × V₂). You are simply spreading the same number of molecules across a larger volume of liquid.
This is the most common operational error in chemistry. In the formula M₁V₁ = M₂V₂, V₂ is the Total Final Volume, not the volume of water you need to add.
For example, if you calculate that you need V₁ = 10 mL of stock to make V₂ = 100 mL of your final solution, you do not add 100 mL of water. If you did, your total volume would be 110 mL, and your concentration would be wrong. You must add the 10 mL of stock to a container, and then add exactly 90 mL of water to reach the 100 mL total volume (V₂ – V₁ = Volume of Diluent).
The Dilution Factor is the ratio of your final volume to your initial volume (V₂ / V₁), which is numerically identical to the ratio of your initial concentration to your final concentration (M₁ / M₂). If you need more clarity, you can learn what is dilution ratio, read how to calculate dilution factor, or easily plug it into our dilution factor calculator.
Yes, absolutely. The general form of the equation is C₁V₁ = C₂V₂, where “C” stands for Concentration. As long as the concentration units are identical on both sides of the equation (e.g., both are Normalities, both are g/L, or both are % w/v), the math works perfectly. If working with equivalents, check out how to convert molarity to normality.
Concentrated acids are typically sold by mass percentage (e.g., 37% w/w HCl), meaning 37 grams of HCl per 100 grams of the total liquid. However, Molarity is based on the volume of the liquid (moles per Liter), not its mass.
To figure out how many grams of HCl are in one Liter of that liquid, you must know how much one Liter of the liquid weighs. That’s what density (g/mL or kg/L) tells you. Once you use density to find the mass of solute in a liter, you can divide by the molecular weight to find the Molarity.
Molarity Dilution Best Practices Checklist
Precision in calculations means nothing without precision at the lab bench. Follow this checklist to ensure your dilutions are accurate, reproducible, and safe.
Trusted Reference Resources for Laboratory Preparation
For more authoritative guidelines on solution preparation, lab safety, and analytical chemistry standards, consult the following resources.
ACS (American Chemical Society) — acs.org; The definitive professional organization for chemists. Their division of Analytical Chemistry publishes rigorous standards for reagent preparation, standardization, and the mathematics of trace-level dilutions.
Flinn Scientific Safety Guidelines — flinnsci.com; An exceptional resource for laboratory safety, particularly regarding the handling, dilution, and storage of concentrated acids, bases, and toxic stock solutions.
IUPAC (International Union of Pure and Applied Chemistry) — iupac.org; The global authority on chemical nomenclature, terminology, and standardized quantities. The IUPAC Green Book is the ultimate reference for the correct usage of Molarity and volumetric units.
User Reviews & Ratings
📝 Share Your Experience with This Calculator
Final Thoughts on Mastering Solution Dilution
Dilution mathematics represents one of the most fundamental, daily competencies required in any wet laboratory. While the core M₁V₁ = M₂V₂ equation is mathematically simple, applying it accurately across different chemical scenarios—from dry solids to dangerous concentrated liquids to multi-step serial dilutions—requires strong procedural discipline.
We designed this Molarity Dilution Calculator to remove the friction from these daily calculations. By providing immediate, step-by-step verification of the underlying algebra, we hope this tool not only saves you time at the bench but also reinforces your intuitive understanding of volumetric chemistry.
🔒 Privacy Guarantee: Every calculation on this page runs entirely within your browser using JavaScript. No data—molarities, volumes, molecular weights, or any other inputs—is transmitted to any external server, stored in any database, or shared with any third party. Your lab calculations are completely private.
Pingback: Sample Dilution Calculator – Calculate Accurate Sample Dilutions
Pingback: How to Do Dilutions in the Lab: Step-by-Step Guide
Pingback: Dilution Calculator Molarity: 3 Steps to Flawless Solutions
Pingback: Ratio Dilution Calculator – Calculate Exact Mixing Ratios Fast
Pingback: Dilution Calculator mg/mL - Protein, Drug & Lab Solutions | Free
Pingback: Weight by Volume Dilution Calculator (W/V %) – Free Lab Tool
Pingback: How to Calculate Dilution Factor: 5 Steps to Flawless Results
Pingback: How to Do a Dilution Calculation – Step-by-Step Guide & Free Calculator
Pingback: Mixing Ratio Calculator – Instantly Calculate 2:1, 3:1 & Custom Ratios
Pingback: Dilution Factor Calculator: Master Precision in 3 Easy Steps
Pingback: Star San Sanitizer Multi-Unit Tool | Free No-Rinse Brewing Sanitizer
Pingback: Neem Oil Dilution Ratio Calculator | Mix Neem Oil Correctly -
Pingback: Proof Calculator | Calculate Alcohol Proof Instantly
Pingback: MIC Dilution Calculator | Calculate MIC Dilutions Instantly
Pingback: Nanomolar Calculator | Convert & Calculate nM Instantly
Pingback: Common Lab Solutions | Preparation Guide & Calculator
Pingback: Pesticide Calculator | Calculate Spray Mix Instantly
Pingback: Micromolar Calculator | Calculate µM Concentrations Instantly